
Last Updated: November 4, 2026
Quick Summary
To plan kitchen remodel electrical work, start with the final cabinet and appliance layout, then map outlets, switches, lights, and dedicated circuits onto that plan before rough-in. Build a wiring diagram, confirm GFCI and AFCI requirements with your local inspector, and check panel capacity for the added load.
- Lock the cabinet layout before placing outlet boxes, since cabinet depth and filler strips shift positions.
- The 2-6-12 rule keeps outlets within 2 feet along counters, 6 feet apart, and 12 inches above.
- Refrigerators, ranges, wall ovens, dishwashers, microwaves, and disposals each need a dedicated circuit.
- Plan lighting in layers: ambient, task, under-cabinet, and accent, each on separate switch controls.
- Record service size and appliance nameplate amperages, then have an electrician run the load calculation.
Table of Contents
- Start With the Floor Plan, Not the Wiring
- How to Place Outlets and Switches in a Kitchen Remodel Electrical Layout
- What Kitchen Appliances Need Their Own Circuit
- Build a Kitchen Electrical Wiring Diagram Before Rough-In
- Kitchen Wiring Code: GFCI, AFCI, and What Your Inspector Checks
- Plan Lighting Layers and Switch Controls
- Use a Kitchen Electrical Layout PDF as Your Planning Worksheet
- Request a Quote for Your Kitchen Electrical Plan
- Frequently Asked Questions
Start With the Floor Plan, Not the Wiring
Most homeowners start planning a kitchen remodel electrical project by thinking about outlets. That is the wrong end of the job. The right starting point is the floor plan, because everything electrical follows the cabinet layout, the appliance locations, and where people stand to work.
A homeowner picks a spot for the coffee maker, then discovers the cabinet run has no wiring behind it. Moving a wire after the drywall goes up costs far more than planning it now.
Here is the order that works:
- Finalize the cabinet layout first
- Mark every appliance location on the plan
- Then map outlets, switches, and lights to those zones
Map Appliances and Counter Zones First
Walk the plan room by room and label each zone. A kitchen electrical layout is simply a drawing that shows every outlet, switch, light, and circuit tied to a real location.
Label these areas on your plan:
- Counter runs where small appliances will sit
- The island or peninsula, including seating overhangs
- Major appliance spots: refrigerator, range, oven, dishwasher, microwave
One mistake we see: homeowners plan outlets before the cabinet layout is locked. Cabinet depth, drawer stacks, and filler strips all shift outlet positions. Lock the cabinets, then place the boxes.
How to Place Outlets and Switches in a Kitchen Remodel Electrical Layout
Good outlet placement comes down to reach and clearance. You want an outlet within easy reach of every work surface, and you want it clear of the sink, the range, and the backsplash cutouts.
The 2-6-12 Outlet Rule and Island Placement
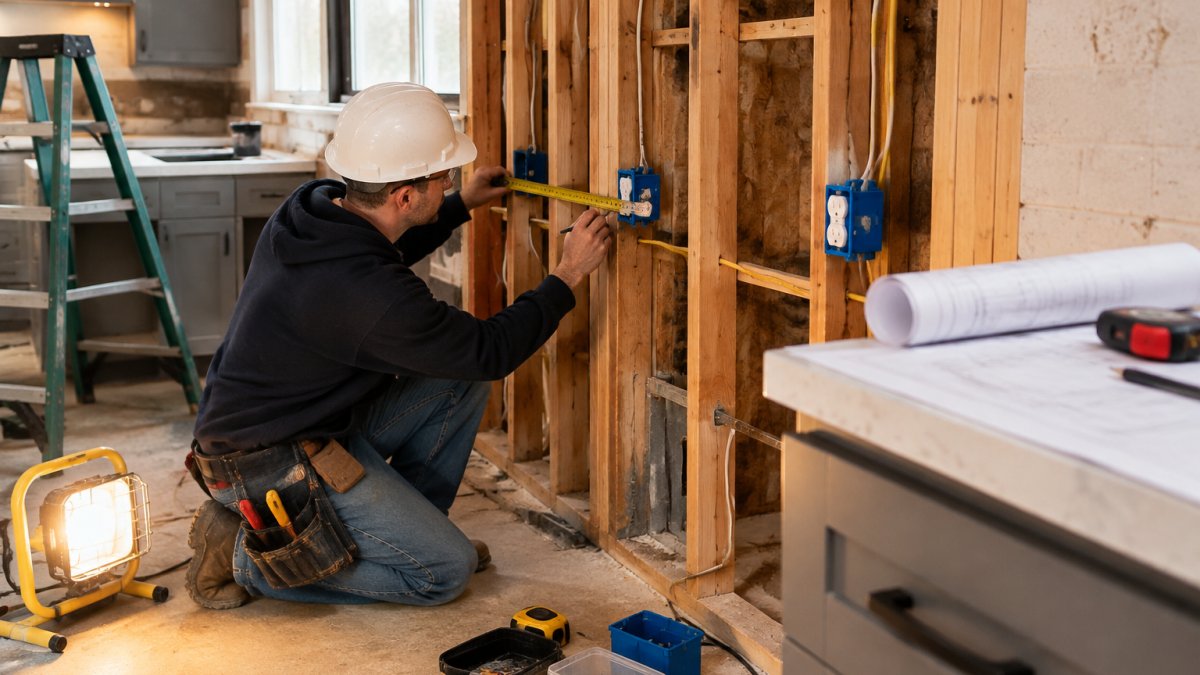
The 2-6-12 rule is a common planning guideline: no point along a counter should be more than 2 feet from an outlet, no more than 6 feet between outlets, and no outlet more than 12 inches above the counter. Check your local code and inspector for the exact requirements in your area, since editions and amendments vary by jurisdiction.
For islands, plan outlets on the side facing the work area, not the seating side. Consider pop-up outlets if you want a clean countertop. Watch out: an outlet placed where a drawer or cabinet door swings will get blocked, so check the cabinet layout before you mark the box.
What Kitchen Appliances Need Their Own Circuit
Major appliances need dedicated circuits. A dedicated circuit serves one appliance and nothing else, which keeps a heavy load from tripping a shared breaker.
How To Wire A Kitchen - Rough In Electrical Circuit Wiring Guide
The Excellent Laborer
Plan dedicated circuits for:
- Refrigerator
- Electric range or cooktop
- Wall oven
Small appliances on the counter share general circuits, but plan enough of them. A kitchen with one circuit for the whole counter run will trip when the toaster and coffee maker run together.
Major appliances need dedicated circuits so a heavy load cannot trip a shared breaker.
| Appliance | Circuit need |
|---|---|
| Refrigerator | Dedicated circuit |
| Electric range or cooktop | Dedicated circuit |
| Wall oven | Dedicated circuit |
| Dishwasher | Dedicated circuit |
| Microwave | Dedicated circuit |
| Garbage disposal | Dedicated circuit |
| Built-in appliance with a large draw | Dedicated circuit |
| Counter small appliances | Share general circuits |
Build a Kitchen Electrical Wiring Diagram Before Rough-In
A kitchen electrical wiring diagram shows where every wire, box, and circuit runs before the walls close up. Rough-in is the stage where wires and boxes go in but fixtures are not yet connected.
Build the diagram in this order:
- Mark every outlet, switch, and light on the floor plan
- Assign each to a circuit
- Note the wire gauge and breaker size for each circuit
- Show switch-to-light relationships
- Review it with your electrician before rough-in starts
A common mistake is skipping the diagram and wiring "as you go." That leads to overloaded circuits and switches in odd spots. A clear diagram catches both before the first hole is drilled.
Kitchen Wiring Code: GFCI, AFCI, and What Your Inspector Checks
Kitchen wiring code centers on shock and fire protection, and the rules are specific enough that guessing costs you an inspection.
The National Electrical Code (NEC) is the model code most jurisdictions adopt, but adoption lags and local amendments are common, so the edition your inspector enforces may differ from the current one.
What inspectors typically look at, and the mechanism behind each:
- GFCI protection on countertop receptacles. The NEC requires GFCI protection for receptacles serving countertop surfaces. Confirm the GFCI distance requirement near the sink in your adopted edition, because this is one of the provisions that has been revised across cycles.
- Two or more 20-amp small-appliance branch circuits. The NEC has requirements for small-appliance branch circuits serving countertop receptacles; confirm the specifics in your adopted edition. This is why a single counter circuit trips when the toaster and coffee maker run together.
- Dedicated circuits for major appliances. The refrigerator, electric range or cooktop, wall oven, dishwasher, microwave, and disposal each typically need a dedicated circuit sized to the appliance nameplate. The nameplate amperage, not a rule of thumb, sets the breaker and wire size.
- Tamper-resistant receptacles. Tamper-resistant receptacle requirements apply to dwelling units, so confirm them in your adopted edition. Plan for them in the box schedule so the rough-in matches the finish.
Watch out: assuming the current NEC edition is what your inspector enforces.
Pull the permit before rough-in and schedule the inspection at the rough-in stage, when the framing is open and corrections are cheap. If you are still choosing who does the work, our guide on how to find a reliable residential electrician covers what to ask before you hire.
Plan Lighting Layers and Switch Controls
A kitchen lighting plan works in layers. Each layer does a different job, and together they make the room usable at any time of day.
- Ambient lighting fills the room with general light
- Task lighting lights the counters and sink so you can see what you are doing
- Under-cabinet lighting lights the work surface and cuts shadows
- Accent lighting highlights a feature or adds warmth
Plan switch placement at the same time. Put switches at room entrances and at the main work zones. Consider dimmers for ambient light and separate controls for task lighting. A common miss: under-cabinet lights wired to the same switch as the ceiling lights, so you cannot run one without the other.
Use a Kitchen Electrical Layout PDF as Your Planning Worksheet
A kitchen electrical layout PDF gives you one page to mark every outlet, switch, light, and circuit before anyone touches a wire. Print it, mark it up, and bring it to your electrician. The worksheet below is built around the step most homeowners skip: the load assessment that tells you whether your existing panel and service can carry the kitchen you are planning.
Use this worksheet as you plan:
- Cabinet layout finalized and measured
- Every appliance listed with its location and nameplate amperage
- Outlets marked within reach of each counter zone
- Island and peninsula outlets placed on the work side
Assess Load and Panel Capacity Before You Finalize Appliances
Start by recording what you have:
- Service size. Look at the main breaker or the service disconnect. Service size varies by home; confirm what your existing service can support for the planned remodel. The service size caps everything downstream.
- Panel bus rating and open spaces. The panel's bus rating and the number of open breaker slots tell you whether new circuits can land without a subpanel or a panel replacement.
- Existing major loads. Electric range, electric dryer, central air, electric water heater, and EV charging all draw against the same service. A kitchen with a new electric range and a wall oven adds load on top of what is already there.
- Appliance nameplate amperages. The nameplate on each appliance gives the actual draw; a planning rule of thumb is not a substitute. Collect nameplates before you commit to the appliance package.
The load calculation itself follows a method in the NEC, and an electrician should run it against your service size.
Three outcomes are common:
- The load fits and the panel has open spaces. New circuits land in the existing panel, and the kitchen plan proceeds as drawn.
- The load fits but the panel is full. A subpanel fed from the main panel adds breaker spaces without a service upgrade, which is often the least expensive path.
- The service is undersized for the planned load. A service upgrade, commonly to 200 amps, is the fix, and it is a permit-and-inspection item that belongs in the budget before cabinets are ordered, not after.
Watch out: finalizing an appliance package with a new electric range, wall oven, and EV charger on a 100-amp service without running the load calculation first.
Bring the completed worksheet and your appliance nameplates to the first conversation, so the scope discussion can start from real numbers.
Request a Quote for Your Kitchen Electrical Plan
The best time to call an electrician is before the cabinets are ordered, not after the drywall is up.
S&T Electrical Solutions is led by a Washington Master Electrician. The company focuses on clear communication and thoughtful planning, ensuring every client understands their project scope from the initial conversation to the final walkthrough.
Ready to talk through your kitchen? Tell us about your electrical project to request a quote. If you are still weighing a larger renovation, see our electrical work for remodels to discuss your kitchen, bath, or addition. Check our electrical service areas around Wenatchee, and if you want a step-by-step view of the quote process first, read 7 steps to get a quote for an electrical remodel.
Get started with S&T Electrical Solutions and plan your kitchen electrical work before rough-in begins.
Frequently Asked Questions
What are the 2-6-12 rules for electrical outlets in a kitchen?
The 2-6-12 rule is a shorthand for kitchen outlet spacing: no point along a countertop should be more than 2 feet from a receptacle, no outlet more than 12 inches below the countertop surface, and wall receptacles spaced so that no spot on a counter is more than 6 feet from one. Always confirm the edition your local jurisdiction enforces, since amendments vary.
Do I need a 15-amp or 20-amp outlet for my kitchen?
Kitchen countertop receptacles are typically planned on 20-amp small-appliance branch circuits; confirm the requirement in your adopted edition. That matters because kettles, air fryers, and stand mixers draw heavy current, and a 20-amp circuit handles them without tripping as easily. A licensed electrician can confirm what your panel and existing wiring support before you commit to a layout.
Which kitchen appliances need their own circuit?
Appliances that typically need a dedicated circuit include the range or cooktop, wall oven, microwave, dishwasher, refrigerator, garbage disposal, and any built-in coffee or wine unit. Electric ranges and ovens usually need 240-volt circuits sized to the appliance nameplate. Check the manufacturer's specifications, because two models that look similar can have different power requirements.
When should electrical work happen during a kitchen remodel?
Electrical rough-in comes after demolition and framing but before insulation and drywall. That is when wiring, boxes, and dedicated circuits get run and inspected. Fixtures, outlets, and switches are trimmed out after cabinets and countertops are installed. Sequencing electrical early prevents costly rework, because moving an outlet after drywall goes up means opening the wall again.
A kitchen remodel moves fast once cabinets are ordered, and electrical decisions made late cost more to fix. Bring in a licensed electrician while the plan is still on paper. S&T Electrical Solutions offers plan review, dedicated circuit design, GFCI and AFCI protection, and inspection-ready work led by a Washington Master Electrician. Get started with S&T Electrical Solutions and request a quote for your kitchen electrical plan.